End-of-Year Data Review and Planning for Teachers

Reviewing your data at the end of the school year is not always fun, but is definitely a MUST! This process was definitely one I had to learn to love. I didn’t love it until I saw the value. With the help of my team and our school’s “data person” (a fellow-teacher who was really good at digging in), I found some really simple ways to make a big impact on my scores. I was sold. 

I know this isn’t exciting, but grab a cup of coffee and stick with me!


I’m going to give you a somewhat vague overview of things to look for because every school is different, so keep that in mind! 

Grab a printable version of this blog post here.

What you need

Gather the following data from this year:

I put all my averages together from each class, so all 98 students’ scores were accounted for in the average (SpEd, R.Ed, and GT). 

  • Average grade for your class (what’s on report cards)

  • Average score of pre-test

  • Average score of each unit test (identified by standard)

  • Average score of each benchmark test (identified by standard)

To the right is an image of my own personal notes from my pre-test, unit tests, and benchmark data for a particular school year. It does’t have to be pretty to be effective! 


What to look at

Here are some key points to consider for your review. The key to interpreting data is to look for patterns. Find where things are consistent and where things are not consistent. 

  • Compare pre-test scores to last benchmark scores = growth

  • Compare unit test scores to bencmarh scores = consistency

  • Compare class grades to last benchmark scores = consistency

Ideally, your unit test scores and the accompanying benchmark scores should be close. If not, here are possible culprits to consider: 

  • One standard is pulling down scores in the unit test (students may have mastered it by the time they took the benchmark)

  • One standard is pulling down scores in the benchmark (students may not have reviewed this enough before the benchmark)

  • If the unit test scores are higher than the benchmark scores, then there could be a discrepancy in the types of questions on the two assessments. Do an item analysis on each and compare. 

  • If benchmark scores are higher than unit tests, double-check the rigor of the benchmark. If the rigor is on par, keep note of your review or reteaching because it was successful! 

Ideally, your class average grades and the last benchmark scores should be close. 

This could depend on your school’s grading policy, so keep that in mind.

  • If your class average grades are lower than the benchmark, then…

    • Review your assignment weights and the number of each type in the grade book 

      • Ex: Is there only one test grade in the 9-weeks, and it’s dragging students way down because it’s the only one and weighted heavily?

    • Review your scoring practice (maybe discuss with another teacher to see how their data is)

    • Review the rigor of the benchmark. Does it match the rigor of your class assignments? 

  • If your class average grades are higher than the benchmark, then you’re like me! My school’s grading policies had certain requirements that led to this, and that’s ok! The benchmarks tend to show only academic knowledge, while the class grades show both academic knowledge and work ethic. However, if you don’t think that’s the culprit, here is one thing you can consider: 

    • Review the rigor of your class assignments: Your class assignments might be “easier” than the prompts on the benchmark. There could be more data in tables, charts, or maps on the benchmark than students are used to interpreting during class assignments, etc. 

    • Review the rigor of your benchmark: is the rigor matched to the rigor of the standards? Does it extend beyond the reach of the standards? 

Hopefully, this helps you dig into your data at the end of the school year! Grab this free guide to use as you dive in! 

Printable Version

Grab this printable version of the blog post to have on hand while you dig into your data!


More great reads…

End-of-Year Teacher Checklist

The end of the school year can be super stressful, but also super exciting. Freedom is so close! Haha! I know you’re imagining yourself frolicking through the sunflowers like this lady…


Before you start frolicking, let’s set you up for success in August now with these end-of-year tips for teachers! 

  1. Start organizing (and purging): I know this is obvious, but I can’t “not” include it. Do your best to really organize to set yourself up for the beginning of the year. 

    • Test and toss markers, highlighters, etc. 

    • Toss random copies you don’t need.

    •  Take inventory and label of all your big items (and really important items) if your school moves everything out of your room during the summer. 

    • Take down and put away classroom decor, if you’re changhing themes for next year. 

  2. Review data (that you have) and make notes for next year. This is a great task to do with your content team! Look at your year’s data and make notes for changes you need to make next year. Do not wait until July or August to do this! The data is fresh in your mind right now, so you will be more efficient and more effective if you do this process now instead of later. For help reviewing your data, read this blog post. 

  3. Oragnize your Google Drive and your Gmail. 

    • Give a home to all of those homeless files your Drive (don’t worry about the “shared with me” files). 

    • Rename files with easy-to-search titles 

    • Share items with your team, if needed

    • Clean out your email inbox

    • Add label or filters that you might need for next year

  4. Make a list of books that you want to add to your classroom library. If you do novel studies throughout the year, you could go ahead and bring home (or research) a new book to read over the summer. 

  5. Make your beginning-of-year checklist. You don’t have to check anything off yet! It’s a great idea, while your mind is still somewhat fresh (tired, I know), to go ahead and create a list of things to remember on your first week back from Summer Break. Leave room to add to this list upon your return, but this will be a great way to bring your mind back into focus! 

Free Checklist

Use at the end of the school year to remember all the things!


More great reads…

Teacher Appreciation Ideas from Students

Here are some fun ideas for Teacher Appreciation Week that you can do with your students to show other teachers some love! 


  1. Decorate the teacher’s lounge with encouraging words on sticky notes: Give students a few sticky notes to write encouraging messages to teachers and display them in the teacher’s lounge. 

  2. Create a Spotify playlist for the teacher to use in the classroom. Students can contribute one or two songs. 

  3. Create “Volunteer” coupons for the teacher of their choice. They can do this as a class or individually. Coupons can include helpful things like: organize supplies, test and sort markers, erase/clean the board, change the date, etc. 

  4. Create a fun photo collage: Send a cute message using signs in a photo collage. Each student can hold a word and stand together in a photo. Print and give to another teacher. 

  5. Teacher Appreciation BINGO card: Students complete a BINGO card for the week to give gratitude to all their teachers. Grab a free copy here! 

FREE Teacher Appreciation Bingo

Give your students a bingo card of challenges to celebrate the great teachers in your building!


More great reads…


Earth Day Activity for Middle School

Finding Earth Day activities to use in your middle school classroom can be tricky sometimes. I often could only find these types of resources for lower grades, and I needed something more rigorous. 

This Earth Day activity is a great one that hits both ELA standards and Social Studies standards! You can use this activity near Earth Day in April, or you can use it when it fits into your standards any time during the year. It’s also a great activity to use in the last weeks of school to bring some structure to the end-of-year chaos! 


Overview of Earth Day Activity: Would You Save the Rainforest?

I titled this resource, “Would You Save the Rainforest?” because I’m hoping to expand students’ thinking past just, “yes, let’s save the rainforest!”. 

There will be two perspectives given to the students: (1) Advocates to preserve the forest and (2) farmers who are using methods that can be destructive. 

Students will read the 2 texts, answer some guiding questions that are aligned to ELA standards and 6th and 7th grade Georgia Social Studies standards (SS6G2b and SS7G2b). 

Then, students will write an opinion writing piece for one side or the other. 

Earth Day Reading for Would You Save the Rainforest?

Students will receive two nonfiction passages, each with a different perspective on the destruction of the rainforest. These passages will be appropriate for 5th through 7th grade. 

Passage 1 will promote the preservation of the rainforest in Brazil and forests in Africa, while Passge 2 will explain the desperation of the farmers who are using this land for survival. 

Earth Day Opinion Writing for Would You Save the Rainforest?

Students will complete an opinion writing on either the side of the forest activists or the farmers. You can either assign them a side at random (half the room, have them pick a color, which side of the M&M is facing up, etc.), or you can let them choose a side. I liked to assign the sides to my higher-level students to extend their thinking. I liked to let my lower-level students choose their side, depending on the group. You know your students, so that call is yours! 

There are resources in this activity that will support your students through this opinion writing process! 

Plus, I have a rubric you can use that aligns to ELA and SS standards for easy grading! 


Earth Day Activity for Middle School

Aligned to GSE’s 6th and 7th Grade SS and ELA standards.

Earth Day Coloring Page

Free coloring page to commemorate Earth Day with your students!

Stations without the Chaos for Middle School Classrooms

Confession. I avoided stations my second year of teaching because they caused me so much stress my first year. I even observed some great teachers implementing stations in their classrooms, but I just couldn’t quite get on board. Is it me? Is it my “group of students”? Nope. I just needed a strategy that worked for me and my students. 

I’ve come up with strategies that worked so well, that we did nothing but stations the last 4-6 weeks before testing every year. Now, that is quite the turnaround! 


The key for successful small group instruction and stations is classroom management. Here are a few tips that will make stations in your middle school classroom run smoothly without all the chaos!

  1. Provide Clear Expectations and Clear Rewards (or consequences)

  2. Working Level Grade
    This strategy came from a teacher-friend of mine. I used this with 7th and 8th graders, and it works! Students rate their daily work ethic on a scale of 1-4. I gave clear expectations of each level, and they graded themselves. I also took notes during the class period. This also gives you a talking point with students if they’re not participating. They can redeem themselves if they get it together!

  3. Move the Stations, Not the Students
    For me, it was always easier to move the stations than the students. If we rotated during class, we moved the station materials. The students stayed in the same spot. This gave us more time in each station, and it lessened opportunities for my students to get themselves into trouble as they transitioned. This was my major game-changer strategy. 

  4. Provide All Appropriate Resources
    When planning an independent station, make sure you provide where to find answers or help. Where can they look it up? Who can they ask?

  5. Groups Don’t Always Mean ‘Together’
    This is especially important for middle schoolers, in my experience. Just because you’re in a group together does not mean that you must work together. Sometimes, they’re working independently on the same assignment. They can ask a neighbor for help, but not work on it together as partners. This can save you from being asked questions that a neighbor could probably answer.

  6. Sticky Note System 

    To keep with who goes where, I used a sticky note system. I labeled each station on a piece of notebook paper. Under the label, I placed the sticky note with the students’ names on it. I had a specific rotation, so at the end of each class period, I would move the sticky notes to the next station. If you have multiple classes, you’ll definitely need an organized way to keep track of who’s been where. You know the kids will get you even more confused, so you’ll need to be confident in your system! 

Use sticky notes to help you keep track of who is going where. You could even write a description of the station under the sticky note to help you keep it all straight.

Rotate the sticky notes in the correct order before the next class period to update.

7. Table Cards with Names

On the first day of our stations, I had table cards with students’ names on it for each station. Students found their name and sat at that station. If you were rotating stations, you could move these table cards. I often had students sit in the same place each day, and I rotated the materials. This used up less instruction time in the beginning of class. They only have to figure out where they’re going once. After that, we don’t need to waste class time figuring it out. 

Students often liked to keep these up every day, so we kept them up!

8. Accordion Folders

Accordion folders were my favorite to use for keeping station materials organized. I put all the copies and materials needed for each station. So, the group leader can grab and go. I also had one accordion folder for each class period that I kept all the group folders in. Each group had their own folder that held all their worksheets from the week. These folders went inside the class period’s accordion folder. You can certainly use a bin instead, but I loved these folders and I had plenty! Your front office might have a box or two you can take!


There are lots to think through before you just “start stations” in your middle school classroom. I have a free Stations Planning Checklist that you can use to make sure you’ve thought of everything! 

Shop Stations Activities in my store!

FREE Stations Planning Sheet

You won’t forget anything with this planning sheet!


Best Escape Room Tips for Upper Elementary

Sometimes you just need a fun activity that doesn’t revolve around a Chromebook. Let students unplug with an escape room. Not quite brave enough for all that? Don’t worry, I can help.


Here are 6 tips that will help you run a fun (yes, even for you) escape room! 

Reference Sheet

Quick, printable version of the blog post.

Group Sizes

I recommend groups of 3 or 4. Groups too large can lead to students who don’t participate, and groups too small may be harder to manage. 

Stations

Display duplicate stations, so students can spread out. This is especially helpful for your larger classes, but I find it’s useful for all class sizes. This will avoid overcrowding. You don’t want more than one group at a station at one time. If you have enough stations available, it will cut down on the inevitable arguing about who got there first. 

Explicit Expectations

Setting explicit expectations is crucial to a smooth escape room activity. Before beginning, review your expectations and the consequences of not meeting them. 

My recommended expectations: 

Whisper 

Stay with your group - you cannot “divide and conquer” and don’t wander off

No running 

Be nice

Participate at every station

Don’t crowd a station - if a group is already there, give them space

Consequences

Consequences are equally important for a smooth escape room. Use your regular classroom consequences as you normally would. I recommend adding a “jail time” or “time out” for groups that aren’t following the rules. This could be a 30-second delay before they can resume the game. Have the group “freeze” or go to a special spot in the room. They’ll wait in silence until their 30 seconds are up. Then, they can continue where they left off. 

Don’t hog the breakout computer

If a group gets the answers incorrect, the entire group must go back and rework the station. This will avoid one student waiting at the breakout computer for the group to get the answers, preventing other groups from putting their answers in. 

Add some FUN!

Set up your escape room with a fun scenario. Sometimes, the cheesier, the better! 

If you want to go all out, grab some blacklights and highlighters! Students absolutely love this because it’s a full transformation! You can use neon paper and white string to really make it pop. 

Grab the Printable teacher tips sheet here

Shop Escape Rooms here.


How to Design an Effective Self-Assessment

I’ve had my fair share of struggles with student self-assessments. I was really excited about starting them, and then it flopped. A big, huge waste of time…until I came up with a better design. 


Read about how to Implement

Get the most out of your student self-assessments.


Designing your Self-Assessment

Prompts

I recommend using open-ended questions instead of matching or multiple choice. The self-assessment should be harder than your actual assessment. Students should be having to use higher level thinking to complete this assessment, especially if your test requires them to use higher level thinking. Avoid using open-ended questions like, “define ______ ” unless that will help with the actual test. Remember your goal is to prepare your students for the test. I recommend lots of application prompts or prompts that require students to draw conclusions. 

Each section (or Learning Target) should have its own prompt. Avoid grouping learning targets together, if you can. 

Each Learning Target, concept, standard, or skill that is covered in your real assessment should be covered in your self-assessment. The prompts on the self-assessment should be the same rigor or higher rigor than the real assessment. 


Rating Scale

I like using emojis as a rating scale because it’s simple and easy to fit. However, you could use numbers (1 is the “I don’t know it all” and 4 is “I can teach it to someone”). Either way, you’ll want to be sure your students understand the scale. Be sure to go over each one explicitly with examples. 

Extras

Somewhere on your self-assessment, I recommend that you include where your students can find help answering the prompts. I used interactive notebooks, so I always included the notebook page number. After the students complete their self-assessment and determine what they need help with, they’re going to need to know where to find the help. If they are studying at home, they won’t have you, so you should leave a page number or a link to a video - whatever you use. 

Read my thoughts on implementing self-assessments on this blog post!

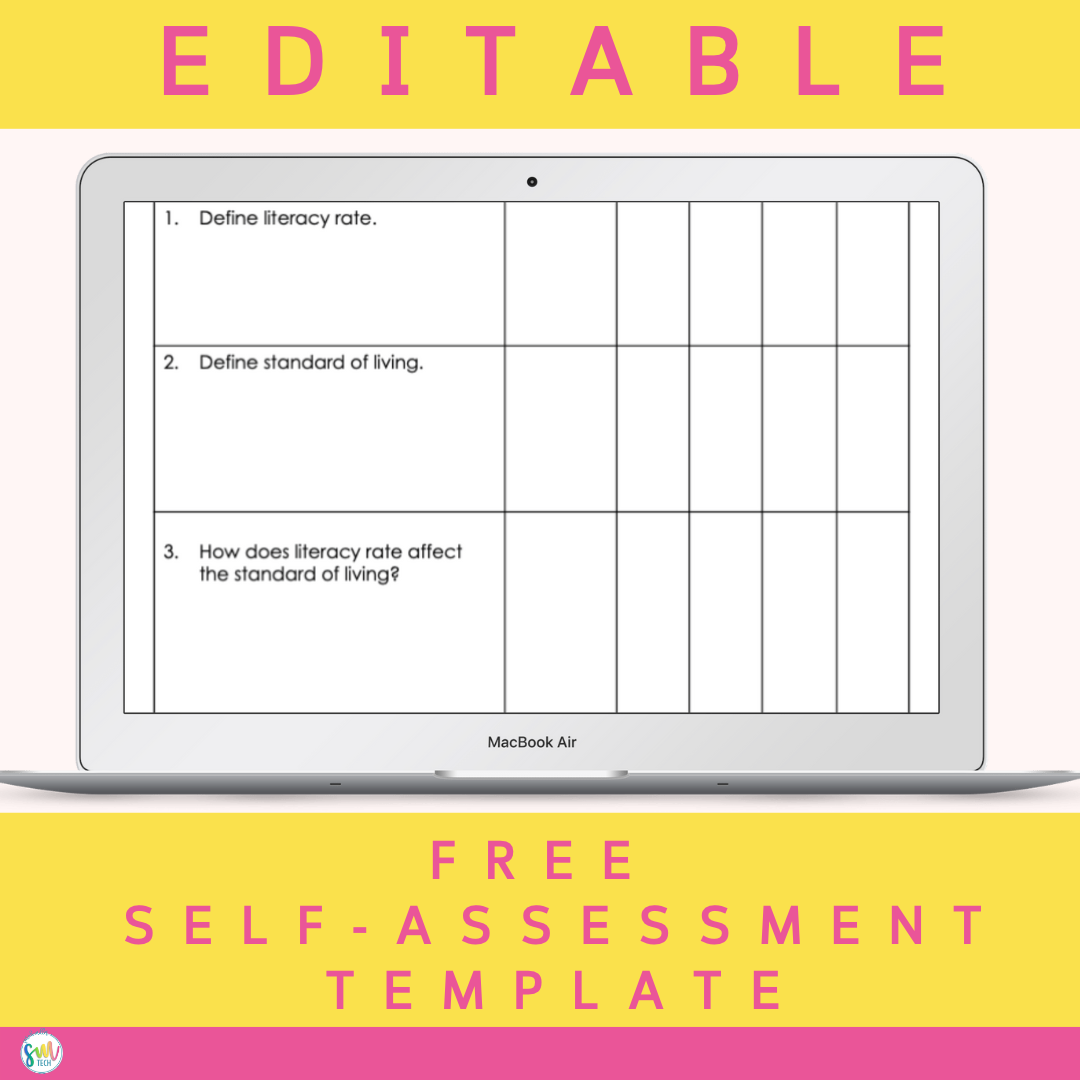
Editable Template

Self-Assessments made-easy.


How a Student Self-Assessment Helps Improve Student Achievement

“I already know all this stuff”

“I don’t need to study”

“I’m gonna ace this test”

Sound familiar? Let me guess. You heard this just before a student bombed your unit test. I sure did. My 7th grade students were always really confident during study time, but then we struggled with our test grades. 

I thought they just didn’t want to study during the time I gave them because they’d rather chat with their neighbor. While that was probably partly true, I began to realize that my students genuinely thought they “knew” the material.

That’s when my “aha” moment happened.

They could skim through their notebook, and know they recognized all the vocabulary and facts. Done. I know it all. Wrong. 

They didn’t realize that they weren’t so great at applying the information. They could recall the facts and definitions, but could they apply that to a higher-order prompt?  My solution to this: self-assessments. 

Editable Template

Self-Assessments made easy.

My Evolution of Self-Assessments

I have to be honest. My first version of self-assessments did not go as planned. I almost gave up on them because it was a waste of time. I created my first version of self-assessments based on ones I found online. They looked similar to the one pictured. 

This type of self-assessment is highly ineffective. It does not require students to PROVE their stance. If they say the “know it” on the paper by checking off by the smart-looking emoji, how is that any different from them saying they “know it” before the test? It isn’t. It’s the exact same, except you’ve spent a significant amount of precious instructional time filling out the paper. 

This led to my self-assessment evolution. I used self-assessments that required students to PROVE their stance. If they said they knew the content, prove it. If they said they didn’t know the content, learn it. 


Learn my tips for designing your self-assessment

Don’t worry, I make it simple. You’ve got this.


Implementing Self Assessments

How

You’ll want to assign this in a way that students find value. Pitch it to them as it’s their way of narrowing down what they need to study. If you can prove that you know most of the content, then you may only need to spend a few minutes studying the rest. 

Learn how to create your own effective self-assessment from this blog post.

  1. Allow students to complete the self-assessment WITHOUT using any resources to look up their answers. This could be 20-30 minutes depending on your class. I always hid my timer, so I could move on based on the class. If they need a sense of urgency, “5 minutes left” even if they really have 10 left on your timer. They most likely won’t catch on…

  2. Then, students are allowed to start looking up answers to the ones they didn’t know. Make sure you spot-check that they’ve highlighted these as the lower scale of their knowledge level (emojis, if you’re using them). This is why I recommend putting the page numbers where students can find help with the answers. It will cut down on the length of this process, and your time assisting students. Having students fill in the correct answers encourages them to not skip the first part of the process. It helps avoid the “I don’t know any of it, so I don't have to do this”. Plus, it can act as a study guide! 

  3. Last, give students a long sticky note. They usually get excited about getting the sticky note - yes, even middle schoolers! Students will make a list of the pages/topics they need to study on the sticky note. This is their “to-do list”. This is their personalized, narrowed-down list of what they need to study before the test. Of course, I still recommend they review the whole self-assessment (which is now their study guide) before the test. But now, they know what to spend the majority of their time studying. BONUS: Parents love this sticky note strategy with the page numbers. I would send a parent notification that they were coming home, and parents were able to help hold their child accountable. 

When

Depending on how much is covered on your test, this process can take a couple of days. I could do a self-assessment for a unit test in 1 or 1.5 class periods. For benchmarks, though, we needed 2 or 3 class periods. 

To be most effective, this should not be rushed. You’ll need to plan to give students time to complete the whole process. This should be done in the days leading up to the assessment.  

Free 6th Grade Economics Self-Assessment

Editable version. Ready to print and go!

Closing

Self-Assessments can help improve student achievement by allowing the students to discover what they know and don’t know before the real assessment. Additionally, it narrows down a study list that is personalized for each student. If done effectively, leading students through this process will teach them valuable study skills they’ll use for years. 

If you want my tips on designing your very own self-assessment, read this blog post! I make it nice and simple!

Creative Ways to Use Word Banks for Differentiation

Let me share two strategies that I have tried and tested in my own 7th grade classroom. These two strategies are great for differentiation, but they’re also great if you’re just looking for something different. 

I’m suggesting you try using digital interactive word banks and word bank walls.  

These two strategies are very different. It is NOT a case of “print vs. digital”. The good news? They’re super easy to implement and easily adaptable to different standards. 

Digital Interactive Word Banks

Digital Interactive Word Banks is, essentially, a word bank that is hyperlinked with hints. 

A student can click on the word in the word bank, and an image, a website, or a presentation (whatever you link) will appear to help the student. 


Example 1: 

Your question is, “The __________ had the greatest impact on Ukraine and Belarus.” Your student could click on the word “fallout” in the word bank and see its definition. 


Example 2: 

Question: The Red Sea is _____________ of Saudi Arabia. 

Word Bank: Each cardinal direction listed in the word bank could link to either a compass rose image or an image of a map of the Middle East/Africa. 


Example 3: 

Question: The United Kingdom has a (presidential or parliamentary) democracy. 

Word Bank: Students could click on the underlined phrase for it to open a picture of your anchor chart that explained the difference. 


The links in your word bank can go do pictures you take from your anchor charts or your notes (just upload the pictures to Google to get a link). They can go to images or maps you find online. They can go to websites that have definitions. If it has a link, you can use it in your interactive word bank. 

Get a free sample

6th Grade European History Sample Worksheet


Word Bank Wall

This strategy is great for reteaching and supporting your lower-performing students. It’s also just fun. If you don’t want your higher-performing students to miss out, let them do this activity too! This activity is perfect for getting your middle school students out of their seats and moving around. 

Instead of giving your students a word bank on their paper, post it on the walls. Use a word bank on your walls or in the hallway! I call this a Word Bank Wall Activity. 


The paper will be folded with the word on the outside (so students can see it from their desks), and on the inside will be the question. They’ll have a worksheet at their desk with the questions, and they’ll use the “gallery” as their word bank. When they’re ready to check, they’ll raise their hand for you to give permission. I usually checked for completion and handed them a highlighter. Then, they go to the word, unfold, and check their paper.

You can also give a printed version of the word bank, so students can cross off as they go. 

Free 8th Grade Activity

Colonial Georgia Review Word Bank Wall Activity

Both of these strategies are great, and you can use both during different activities! They can easily be adapted to any of your standards and will provide support for your students. 

My Top 7 Strategies for Differentiation

Read the blog post.

Avoid These 3 Mistakes Teachers Make when Creating Digital Assignments

When I was an Instructional Technology Coach, I saw a lot of wonderful things teachers were doing with technology. I also saw a lot of mistakes.

I was the very first Instructional Technology Coach of my district, so teachers weren’t used to having someone coming into their schools advocating for (or “pushing”) technology. Many were not shy about their hesitation and frustrations with using technology. I found that often, their complaints were based on things that could be resolved with their approach (management) and the design of their assignments. 

Here are 3 mistakes I often saw teachers making when assigning digital assignments.  No judgment, here. These mistakes were sometimes made by really good teachers. 


Mistake #1: Using technology simply to replace a paper assignment

Using technology can be a great way to extend learning. However, I have noticed that sometimes teachers have used technology to simply replace a paper assignment. There is nothing wrong with this in an overall sense - especially in the world of distance learning. However, I would like you to think about how we can extend past that in certain assignments. Not every digital assignment needs to be a big, huge ordeal. Conversely, not every digital assignment needs to be a substitute of a paper assignment. 

If you haven’t heard of the SAMR model (and you’re interested in instructional technology), you should definitely research it! Explaining that is for another day, but I want to touch on the basic premise of the SAMR model. SAMR is substitution, augmentation, modification, and redefinition of assignments. It represents how technology impacts an assignment. The SAMR model is NOT a ladder, and our goal is not to always be in the ‘redefinition’ phase. It simply allows us to define how we’re using technology in an assignment. Using technology to substitute paper is perfectly acceptable in some situations. Let’s just make sure we don’t stop there! 

I encourage you to try to include some digital assignments that might fit in the augmentation, modification, or even the redefinition phase of SAMR. 

Here are some examples. 

  1. Use the comment or suggesting features in Docs to guide students in their work

  2. Students can create a presentation with videos embedded

  3. Students can create charts in Sheets to visualize and organize data 

  4. You can create your lesson plans in Docs with hyperlinks to all of your resources

  5. Create an interactive word bank in a digital assignment (words in the word bank are hyperlinked to images that help students)

  6. Allow students to choose to write, record audio, or record video to express their responses 

See, it doesn’t have to be super complicated to be out of “substitution”. We just want to make sure that we can take advantage of technology when it’s appropriate. 

Mistake #2: Leaving the research and the design open-ended

This mistake can lead to a few problems. First, leaving the research or the design open-ended can lead to students taking much longer to complete the assignment than you planned. It can also lead to students giving work that isn’t what you wanted. They might turn in work that’s lacking content or with irrelevant content. 

Leaving the research open-ended

You have to be really careful with leaving the research open-ended, especially in social studies. Your students may stumble across content that is inappropriate despite your school’s filters. Plus, you might find students turning in work that is not aligned with their assignments. 

Here are some strategies that you can use to avoid making this mistake. I recommend using all 3 strategies during a research-based digital assignment. 

  1. Do your own Google searches for every single thing you’re asking students to research. Make sure that what’s coming up on images is something you’re ok with them seeing. If you’re teaching Georgia middle school social studies, you may have to choose wisely here. Many standards involve conflict and violence. 

  2. Curate resources for students to gather their information. This may take some time upfront, but it may be necessary for some of those more conflict-related topics. You can use Google extensions like OneTab or Toby Mini to gather links (students do not need the extensions, just you). I like giving students choice, so I would provide multiple links for them to choose to get their information - if possible. 

  3. Last but not least, create a template for their research assignment. This can be as fancy or as simple as you want it to be. I recommend this to be a scaffolded process. Provide students with a lot of guidance in their template in the beginning. Hopefully, by the end of the year, you can give a simple template with little guidance. 

Here is an example of a template.


Grab this Google-Ready Research Activity

Southwest Asia Government Digital Guided Research Activity for 7th Grade


Leaving the design open-ended

This hang-up with leaving the design open-ended is two-fold. One: timing. Two: Content. 

In my experience, my 7th graders would spend the entire class period choosing their backgrounds, fonts, and font colors if I let them. We’d be on Day 2, and they literally had zero content. 

I also noticed that students sometimes have trouble deciding what to put on a slide and how to organize the information. Which pieces of information should go on slide 1, and what should go on slide 2, and so on. 

Here are my 2 tips to avoid making this mistake. 

  1. Set a timer for all “decorating”. Give your students a visual timer (you can just type in ‘timer’ in Google) for them to decide their backgrounds and fonts. I used to give 10-15 minutes. 

  2. Use a template. This is the same tip as before. The template will help students organize the information and keep the content relevant. They’ll know what goes where. 

**Bonus Tip: Help students who are spending too long deciding on the “perfect” image for their presentation by inserting 2 or 3 onto their presentation for them to choose from. Avoid approaching this as a ‘punishment’. You’re being helpful, not annoyed. ;) They can come back to it later if they have time, but for now, they at least have something that won’t impact their grade. 

Mistake #3: Expecting Students to Self-Pace Appropriately

It’s no secret that students complete tasks at different paces. Teachers help students self-pace during paper or non-digital assignments often. However, I’ve noticed that sometimes teachers have different expectations of students with digital assignments. They expect students to finish around the same time and often get frustrated when it’s Day 3 and the student is still on Day 1’s assignment. This is when I hear, “I hate assigning digital activities because it takes them forever!”

From my experience, this same student would likely have made the same progress with a paper assignment if it was presented the same way as the digital assignment was: here’s your list of things to do by the end of the week. 

Here are a few strategies you can use to avoid making this mistake.

  1. Create deadlines, make them visible, and give verbal reminders. 

“By 10:30, you should have x, y, and z finished”. Then at 10:30, “if you’re not finished with x, y, and z, you need to move faster or let me help you.” 


2. Take note of each student’s progress at the end of each class period. 

You have options here. I used a variety of methods that depended on my mood. You can create a checklist on a roster of all your ‘deadlines’ and write the date each student completes it. You can just walk around the room and quickly check as they’re working. 

You can also go into Google Classroom and check the progress of each student. This is time-consuming, especially if you’re in middle school and have close to 100 students. I did this at certain points of the project, not every day. Other times, I would check in a rotation of my classes: Tuesday, I check Period 1; Wednesday, I check Period 2; etc. 

3. Be present. 

Walk around the classroom and monitor. Avoid sitting at your desk as much as possible! Students working on a digital assignment should not equal an extra “planning” period. 

If you’re interacting with students digitally with their work, you’ll obviously need to be on your computer. Take breaks every couple of minutes to walk around the classroom. 

Why? Other than obvious classroom management reasons, being present will allow you to monitor students’ progress. You’ll be able to notice that Johnny is still on the same slide he was on the last time you made your rounds. Is he confused? Is he spaced out? Is he stuck trying to choose the perfect image? Check and see. From my experience, middle schoolers are more likely to ask you a question as you’re passing by than they are to raise their hand in a quiet classroom and ask aloud. Being present provides them that opportunity. 


Best Differentiation Strategies for Social Studies

The Basics of Differentiation

If you’re here, you probably know the “basics” of differentiation. I just want to point out that differentiation can be applied to different phases of learning. 

These phases are:

  1. The content (how students receive the information)

  2. The process (your teaching and their practice)

  3. The product (how students deliver information)

  4. The learning environment (seating arrangement, sounds, distractions, etc.)


7 Strategies for Differentiation

Most of these can be applied to the content, process, or product phase of learning. I’m numbering them to stay organized, but they do not go by level of importance! 


Grab the reference sheet here - it gives you a printable, short version. Be sure to read the blog post, though, I have lots of tried and true tips to share! 

Quick Reference Guide

Short, printable version with a list of differentiation strategies


  1. Reading Levels

Differentiated reading texts are incredibly helpful for social studies (and other subjects, of course)! Often, I wanted my students to get some nonfiction reading in, but my main focus was the actual content of the text - not the reading. Eliminate some of the barriers by providing lower-level text to those who need the support. I also support using the same high-level text, but bringing the students up with support - that’s for another blog post! 

You can use these different levels in a few ways - it just depends on your students or your mood ;) 

You can give individual students the level they need, and everyone works independently. Or, you can have students in pairs with the same level text. Or, you can use one level for one class and the other level for your other class. 

For middle school students (or really any level), I think it’s really important to be discreet with this! I tried to structure my differentiated reading in a way that the students had no idea there were different texts floating around the room. All the questions were the same, so when we came back together to share - no one knew. 

8th Grade Reading Packets

Every standard. Differentiated.


2. Sentence Starters/Fill-in-the-Blanks

I used these two strategies a lot in my 7th grade classroom, so I know they’re powerful! Depending on your students, you can do this with your whole class or certain students. In one year, I had a whole class who benefited from these strategies, while in other classes just a handful of students needed the extra support. 

I recommend using sentence starters and/or fill-in-the-blanks for constructed response prompts. Even middle school students need lots of support for writing prompts! I found that my students were compartmentalizing writing strategies. They were using the “RACE” strategy in ELA, but they didn’t realize they could use it in other classes, too. Help them break that compartmentalized thinking by using the same strategies as your ELA teacher for constructive responses. Consistency will be helpful! 

Once you know the ELA strategy to use for constructed responses, support them by providing either sentence starters or fill-in-the-blanks. Sentence starters are for those who need “less” support, and fill-in-the-blanks for those who need “more” support. The ultimate goal is to gradually move them off of this support. Meet students where they are now, and support them as they move up the rigor scale! 

3. Word Bank

This is another strategy to support students during writing prompts. This is providing less support than sentence starters, but it is still super helpful. Instead of requiring a certain number of sentences in their writing (you know they always ask that question!), I required certain words to be in their answer. 

Create a word bank of words that are required in their answer. If you choose these words strategically, it will be really helpful in guiding the students to create a response that has some depth. It also reinforces vocabulary! 

Another way you can use a word bank is to create a Word Bank Wall! This is one of my favorites! This is great for whole-class support. 

Here’s how it works…Print a paper with the “answer” on the top and the “question” on the bottom. The paper will be folded with the word on the outside (so students can see it from their desks), and on the inside will be the question. These will be posted around the classroom. Students will have a worksheet at their desk with the questions, and they’ll use the “gallery” as their word bank. When they’re ready to check, they’ll raise their hand for you to give permission. I usually checked for completion and handed them a highlighter. Then, they go to the gallery word, unfold, and check to their paper.

To support individual students in the Word Bank Wall activity, provide them with a printed version of the word bank, so they can cross off as they use them. Also, you can eliminate any prompts that use words twice. 

If you don’t want to eliminate prompts, you can tell the student which numbers will have the same answers (ex. Numbers 3 and 7 will have the same answer, and numbers 9 and 15 will have the same answer). 

Grab this Freebie

8th Grade Colonial Georgia Review Word Bank Wall Activity

4. Graphic Organizers

I definitely recommend using graphic organizers during your teaching. You can also use them to support your students with their constructed writing prompts and before assessments. 

Allow students to use their graphic organizers from class to help them form their answers for constructed response questions. If they don’t have one from class, have them do that first, before writing, to organize their thoughts. Check this before you have them start writing their response. In the beginning, you may need to provide support on how to turn the graphic organizer into a writing response. This is a great activity for a small group lesson! 

Using a graphic organizer as a brain dump before assessments was a game-changer for me and my 7th grade students! This idea actually came from a Special Education teacher whose daughter was in my class. We had a certain graphic organizer that we used for a certain unit, and she suggested that I give a blank one to students before I pass out the assessment. I allowed them to fill it out (within a time limit) as much as they wanted. Then, I passed out the assessments, and they could use their graphic organizer for help. This made a HUGE difference! Not only were students scoring better on the assessment, but it also lessened the students’ stress over the assessment. In most cases, my assessments did not have a lot of recall, so the information wasn’t like a “free pass” or “free answers”. Plus, they could not use their notes to fill out the blank graphic organizer, so I knew that they “knew” the information. Use your discretion with this! 

5. Eliminate Answer Choices

If you’re using multiple-choice prompts for either practice or assessment, you can try eliminating one or two answer choices to support your students. You might want to use caution here! Check with the student’s accommodations. If this is not a testing accommodation, you’ll want to make sure you are able to gradually wean them off of this strategy. You don’t want them to get used it for every practice and every assessment just to get to the state test and not have this support. 

6. Scaffold Learning/Tiered Learning Targets

If you’ve been around me, you know that I’m a huge supporter of scaffolding student learning and tiered learning targets! I go really in-depth in one of my webinars. You can access the replay here - it’s GOOD stuff…and it comes with some downloads! 

Ultimately, if you are able to break the standard into categories of what the student should be able to do as a beginning learner, developing learner, proficient learner, and distinguished learner, you’ll be able to use this information for differentiation. 

You can group students based on where they fall in the categories and/or you can provide individual support. 

Scaffold Student Learning Webinar

Get a quick PD with this pre-recorded webinar! I got into all the details of how to create your beginning, developing, proficient, and distinguished categories based on your standards.

7. Choice in Product

This is a very common strategy! Give students choice in how they deliver their answers. I used this a lot with my 7th graders. For long, constructed responses, they were able to choose between a written response, a video response, or an audio response. I used Google Classroom for this, so all their responses were in one place. This helped keep me organized! 

While I used this strategy a lot, I don’t recommend using it for every single constructed response. Students will still need to practice writing! 

8. Bonus Strategy to Boost Engagement

This is one of my favorite strategies for the middle school classroom! If you know you’re going to ask for volunteers to share their answers, prep the specific students. As they’re working and you’re walking around spot-checking and helping, speak with the specific students you’re going to call on. 

From my experience, middle school students are very hesitant to answer aloud. That’s often from their fear of getting the answer wrong in front of everyone. If you prep the student ahead of time, and reassure him or her that their answer is correct, they’ll be more likely to speak up. They’ll have time to get the courage up and “practice” their answer (if it’s a complicated one) before you call on them. 

I tried to do this discreetly, so it wasn’t obvious to everyone that I was hand-picking who was going to share. When it came time to share, I just called on the student without making a big deal about it.  

Differentiation is a must in the classroom. It’s also difficult because you really have to learn what works best for your students. Then, you’ll get a new group of students to learn! Hopefully, these tips were helpful and provided some inspiration! 

Make sure you grab the Reference Sheet here, so you can keep me with you as you support your kiddos! 

Quick Reference Guide

Short, printable version with a list of differentiation strategies


4 Strategies for Reteaching in your Middle School Classroom

Reteaching in the middle school social studies classroom doesn’t have to be complicated. I know most of us want to reteach skills or concepts our students haven’t quite mastered yet, but it can be difficult to find the time. I’ve got 3 strategies that you can use to reteach, even if you don’t have a ton of time! 

If you need a refresher on the “what” and “when” to reteach, read this blog post! This blog is the “how” of the series. 


Read more about Reteaching

The “what” and the “when” to reteach.


Strategy 1: Small Groups/Stations (Differentiation)

Small groups are a great way to reteach and provide differentiation to your classroom. Small groups are frequently used in lower grades, but it seems like they’re not used as often in middle school classrooms. 

The key to successful small group instruction in middle school is classroom management. You’ll need to provide clear expectations and rewards (or consequences) for meeting those expectations. One strategy I liked for my 8th graders is called a “working level grade”. Students would rate their work ethic on a scale of 1 - 4. I had clear explanations of each level, and they graded themselves. Of course, I would take note during the class period. I could even say to a student, “You’ve dropped down to a 3, but if you get it together, you can redeem yourself.” This is a quick way to have accountability during stations when you can’t be everywhere. You’ll probably find that students grade themselves harsher than you might have. 

Another tip for simplifying stations in the middle school classroom is to have the stations move - not the students. I found that my 55-minute class period was not enough by the time we did our bell-ringer and got settled in our first station to transition every 15 minutes to a new station. It was easier for me to bring the station supplies to the group. Then, they’d pack it up and one student would bring it to the next group. Another option would be to have students only go to one station per class period. The next day, they’ll go to the next station. This would only work if you have the time built in. 

Now, back to small groups and stations for reteaching! Small groups allow you to work with fewer students at a time, but it also allows you to differentiate based on students’ needs. 

I recommend that the teacher lead the “reteaching” group, so you can quickly clear up any misconceptions and take note of students who may need even more support. 

Free Stations Planning Sheet

Feel confident and organized for your stations with this planning sheet. Also included is a helpful checklist to make sure you don’t forget a thing!

The other station could be on a different topic or the same topic - depending on who needs the reteaching support. You’ll need this station to be as independent as possible. If you’re giving a worksheet, where will students go if they don’t know the answers? You know middle schoolers! If they don’t know the answer, and you don’t tell them to look it up somewhere, they’ll leave it blank and take a break! Make sure you have a reading passage, a video, notes, or a textbook for them to use to look up answers. You can also have them use this to check their answers or to check their group members’ answers. Another note - just because students are in this “group” doesn’t mean they have to work “together” as a group. I would tell my 7th grade students, “you are working independently, but you can ask a neighbor for help”, and then explain what that means. Ultimately, I don’t mind if they ask their neighbor a quick question, but we’re not copying or doing the whole thing together. 

For reteaching, stations are a great option. You can use your teacher-led station for reteaching and the other, independent station for extension learning or to introduce a new topic. 


Strategy 2: Visuals

Using visuals for reteaching is no secret. Visuals are a fantastic way to help students solidify their learning, especially if it’s something they are struggling with. You likely used visuals in your initial teaching strategies, so you can repeat this for reteaching or choose a new visual. This will depend on your students and your content. I’ll list a few that work great for history and social studies. 

Graphic organizers

Graphic organizers are great in just about any circumstance! You can use different graphic organizers during different points of learning. For example, you can use a web organizer in the beginning of the learning and build up to a cause-and-effect graphic organizer or a Venn Diagram. 

In your history standards, you’ll find that cause-and-effect, timeline, and problem-solution are pretty easy to use. If you’re reteaching with a reading passage, though, you can also use a main idea/supporting details graphic organizer. This will help to achieve a similar result (if you choose the right reading passage) and will lead students into the cause-and-effect visuals. 

I liked to use graphic organizers as a support tool for differentiation. If we used a graphic organizer or a chart in class, I would give students a blank one to fill out just before I passed out an assessment. This helped them to “brain dump” what they remembered into the graphic organizer, which helped them with the higher-order thinking prompts on the assessment. This might be a great option if you’re allowing students to retake an assessment after reteaching. 

Illustrations

Add some illustration activities to your reteaching lessons! This is a great way to force students to visualize a concept - they may even be required to think symbolically. 

Here are some examples for social studies: 

  • Draw 1 illustration that represents the people’s opinions when Castro took over Cuba, and draw 1 illustration that represents the people’s opinions after years of Castro’s regime. 

  • Illustrate a poster to support the Anti-Apartheid Movement

  • Illustrate a political cartoon that represents Europe Partitioning and explain why it’s the root of many conflicts. 

  • Illustrate the Berlin Airlift and write a brief summary of its importance 

Gallery Walks

Gallery Walks are one of my favorite activities! I love that it gets students up and moving! You can insert a Gallery Walk into almost any lesson or topic. It’s great to do with primary and/or secondary sources, but the possibilities don’t stop there. 

There are a variety of ways to implement a Gallery Walk, so know that it’s super flexible. I’m sharing a brief run-down, but you do you! 

The jist of a Gallery Walk is that you post images (or documents) around the room and/or into the hallway. Students will answer prompts as they walk around the “gallery” of items. I recommend setting this up in a way that does NOT require students to go in order. For my middle school students, it was easier for me to say, “If there is more than 1 person at the spot, move on and come back”. 

Gallery Walk for 7th Grade

SS7H2c Kurdish Nationalism Activity

A fun twist on your traditional ‘Gallery Walk’

I have a twist on your Gallery Walk that I loved to use with my 7th grade students! You’re going to love this because it’s great for reteaching and supporting your lower-performing students. 

Instead of posting images as your “gallery”, post vocabulary or phrases. Use this as a word bank on your walls! I call this a Word Bank Wall Activity. The paper will be folded with the word on the outside (so students can see it from their desks), and on the inside will be the question. They’ll have a worksheet at their desk with the questions, and they’ll use the “gallery” as their word bank. When they’re ready to check, they’ll raise their hand for you to give permission. I usually checked for completion and handed them a highlighter. Then, they go to the gallery word, unfold, and check their paper. 

Complete Word Bank Wall for

8th Grade

Grab this FREE editable Word Bank Wall review activity for SS8H2. If you don’t teach 8th grade, grab this to use as a template to create your own!


Primary/Secondary Sources

6 Strategies for Using Primary Sources Blog Post

Plus sample questions for analyzing them!

Using primary and secondary sources is a great way for students to connect with history. You’ll probably want to use these in your first set of lessons, rather than during your reteaching lessons. However, you might be in a situation where you want to do a second analysis on a primary or secondary source. 

Here are some strategies you can use: 

  • Black Out

  • Zoomed In

  • Timeline

  • Matching

  • Compare/Contrast

  • Gallery Walk


Strategy 3: Games or Competiton

Games are always a fun way to review, but you can also use games to help reteach! 

You can easily turn any worksheet or study guide into a game if you have the right supplies handy! 

  • Gameboards (you can easily draw one out on paper)

  • Game pieces (colored erasers work great)

  • List of questions with answers (study guide/worksheet/notes)

  • Prize for winners (optional; it could just be “bragging rights” with their name on the board)

Group students into 2 or 3 and give them one copy of the questions. Let them do rock, paper, scissors and the winner goes first. The other player will ask a question from the sheet, and if the students answers correctly, he moves forward one space. Then the next student answers a question, and so on. 

Keep this super simple, and it will help you stick to what’s important - the content, not the production of the game

If you have the time to put it together, you can always use a classic Jeopardy-style game. I have a video tutorial on how to make one here.

Stimulation Games are also fun for review or reteaching. If you’re creative, you’ll have a lot of fun creating your own. If you’re not into that, there are plenty for sale! In Stimulation Games, students are “in” the game. It’s kind of like a “choose your own adventure”. The results change based on the players’ decisions. 

8th Grade Stimulation Game

for land policies during Westward Expansion (SS8H4b)


Bonus Strategy

If you’ve made it this far into the blog post, YAY! You deserve a bonus tip! My bonus tip might sound obvious, but I want you to really think about it. 


Focus on small chunks of information at a time

Really think about what this means when you’re developing a reteaching strategy. Really consider what your students “must know” versus what “it’d be nice for them to know”. Once you can narrow that down, it’ll help you focus on the smaller chunks at a time. 


Use these three strategies for your reteaching lessons: small groups, visuals, and games. 

If you need a refresher on the “what” and “when” to reteach, read this blog post! This blog is the “how” of the series. 


What to do when you're running out of time in your unit

It’s inevitable. There will be a time in your teaching career when you will realize that you’re running out of time in a unit. You’ll realize that your assessment is fast-approaching, and your students are not ready. What do you do?

There are so many perspectives on what to do when you’re running out of time. Ultimately, it all depends on your students and your standards. I’m going to share 4 strategies you can use when you’re running out of time to teach your standards. Keep in mind, though, these specific strategies may or may not work based on your students and your standards. Teaching is often trial and error, and this is no different! 

 
woman looking at watch
 

Keep It Simple, Sweetie

Honestly, the phrase, “keep it simple, sweetie” can be applied to most things in teaching. Let’s use it when you find yourself running out of time in your unit. We’re using this phrase in terms of “trimming the fat” off of your lesson plans. 

Let’s say you have only one week left before your assessment, but you have two weeks of your plans to get through. You’ll need to separate the “must-knows” from the “it’d-be-nice-to-knows” and the “must-dos” from the “it’d-be-nice-to-dos”. You probably have both in your plans, but when you’re running short on time, cut it. 

Let’s look at an example of a 7th grade standard (SS7G8) about Southwest Asia’s cultures. Religions and ethnic groups lend themselves to lots of fun instructional time and activities. However, if you’re short on time, you may have to skip those for now and maybe do them after testing. You might have an extra two class periods dedicated to diving deep into different religions, but is this what students “need” to know or “it’d be nice” for them to know? Or, you may not have time to do that research project that usually takes 3 class periods. Can you modify it to 1 class period? Or, do you have to skip it altogether? 

You’ll need to separate the “must-knows” from the “it’d-be-nice-to-knows”

Priority Standards

This strategy is similar to the first one because it requires you to identify the priority standards in your unit. This can be tough for our Georgia Social Studies teachers because the state does not provide a specific list of “priority” standards. But…they do provide us with domain weights in their assessment guides. We can use this to help us determine which are “priority” standards. 

Before I give you tips on this, I have to give a disclaimer. This is information is my interpretation of the standards and assessment guides. This is not endorsed or approved by GaDOE.


Here are the Domain Weights for 6th (2015), 7th (2015), and 8th (2020). I’ll have them linked below, so you can access the actual document. 

Use these weights to determine what your “priorities” are in your curriculum planning - especially if you find yourself short on time. For 6th and 7th grade, you’ll want to make sure your students have mastered those geography standards. 8th grade students really need to master those history standards - history is 50%!


Grab this free printable version!

Domain Weights for grades 6, 7, and 8

Standards checklist separated by domain for grades 6 and 7


Cover Now, Review Later

“Cover now, review later” is a personal favorite of mine. I used this strategy when I taught 7th grade, and it was a classroom game-changer for me. The caveat here is that you actually have to have the time to review it later. If you push into that “review” time at the end, you’re in trouble. 

Many of the “recall” standards will have to be reviewed at the end or just before the assessment anyways. If you’re short on time for the entire unit, you could briefly expose students to the recall information, then move on. You’ll review the recall information again just before the assessment. 

If you go this route, you’ll need more time to review than you may have needed in the past. I typically planned a minimum of 4 weeks of review time before our end-of-year assessment. I had the time because we rushed through certain parts of the curriculum (based on priority and depth of knowledge.                                                                                                                                                                                                                                                                                                                                                                                                                                                                                                                                                                                                                                                                               

Try Stations

Stations are always a great fall-back plan. You can cover more in less time, if you’re strategic. You can plan to have one or two stations that are student-led and one that is teacher-led. You can introduce a new topic in the student-led stations and help students master a current topic in the teacher-led. 


Typically, we have stations that cover different aspects of the same topic. In this strategy, though, I’m suggesting that you have two different topics in two different stations. 

For example, you’re still working on SS7G8 Southwest Asia’s cultures. You’ve covered SS7G8a (difference between ethnic group and religious group), and you’ve introduced SS7G8b (ethnic groups in Southwest Asia), and now you’re rushed to cover SS7G8c (religions in Southwest Asia). 


Station 1: Independent/Student-Led: Reading Packet or Video with comprehension and standards-based questions on religions in Southwest Asia. 

Station 2:  Teacher-Led: Review of ethnic groups in Southwest Asia and differences between ethnic and religious groups. 


MY TIPS: 

  • I recommend the teacher lead the review station, so you can quickly identify and clear up misconceptions. Make note of misconceptions as you’re working with students. You may be able to hit this again in tomorrow’s warm-up. 

  • Leave enough time at the end of class for a good summarizer. You’ll want to make sure you (the teacher) can give a brief summary of what they learned in the independent station. Then, give a quick 3-question exit ticket, so you have a formative assessment. Use this to create tomorrow’s warm-up. 

  • I recommend keeping these stations at 3 or less - unless you have a 90-minute block. Students will need ample time to learn the new topic, and you’ll need ample time to work with them on the review topic. By the time you leave 15 minutes for a summarizer, the time for each station is already limited. 

Free Stations Planning Guide

Plan your stations quickly with this free guide and checklist!


Closing

When you find yourself short on time in your unit, give these four strategies a try! 

  • Keep It Simple, Sweetie - Separate “must-knows” and “must-dos”. 

  • Prioritize Standards - Use domain weights to prioritize some standards over others

  • Cover now, review later - Save extra time at the end for an extensive review, so you can move on from recall standards before students have shown mastery

  • Stations - Use stations to introduce a new topic, while reviewing another topic


Need to know WHEN and WHAT to reteach?

Read this blog post.


Tips for Reteaching in your Middle School Classroom: the "when" and "what"

A common expectation for middle school teachers is to reteach when students are not mastering the standards. But what does that really mean? 

Here’s my take on reteaching: Teaching is an ongoing cycle, and needing to reteach is NOT a sign that you’re an ineffective teacher.

Let’s simplify reteaching in a way that allows you to be most effective with (hopefully) the least amount of stress! 

I’ve also got a printable quick reference guide that highlights the key points of this blog post. Download it here.


First, let’s back up

Before we can identify times that we need to reteach, we need to have a good understanding of what mastery looks like and ways to figure out if students have reached that mastery. Let’s talk Learning Targets and Formative Assessments - exciting, I know. Hang in there! 

We need to know “where are we going?” and “are we there yet?” before we can start reteaching. 

Clear Learning Targets

If you teach in Georgia, you may have participated in GaDOE’s Formative Instructional Practices (FIP) training. If you haven’t (and you’re in Georgia), you may want to ask about it! The FIP training covers all you need to know about Learning Targets and Formative Assessments (plus, it covers how to give effective feedback). 

Simply put, Learning Targets are the “where are we going”. Learning Targets can be broken down into daily targets that build to a weekly target (this is how I used them in my classroom). 

Here’s an example: 

Weekly Target 

  • I can explain the causes and effects of air pollution in Mexico City, Mexico. 

Day 1 Targets 

  • I can define air pollution. 

  • I can define smog. 

  • I can identify common causes of air pollution.

  • I can identify common effects of air pollution. 

Day 2 Targets 

  • I can identify causes of air pollution in Mexico City, Mexico. 

  • I can identify effects of air pollution in Mexico City, Mexico. 

Day 3 Target 

  • I can explain the causes and effects of air pollution in Mexico City, Mexico. 

Day 4 Targets (extension) - 

  • I can explain how Mexico’s City’s location (low elevation) and climate (hot and dry) contributes to air pollution. 

  • I can analyze the relationship between the city’s population and its air pollution. 

  • I can describe efforts to combat the city’s air pollution.

Learning targets are created directly from the standards. Oftentimes, the standard requires background knowledge before students can master the standards. In these cases, it is important to add learning targets to support the standard - as I did in my example. The actual standard didn’t show up until Day 3 because we need to make sure students know what air pollution is and the common causes before we identify the causes in a specific place. Then, we’re able to extend the learning with Day 4’s Learning Targets. 

Essentially, you need to know “where students are going” to know if they’re there yet. This is where the Learning Targets are beneficial.

Formative Assessments 

Formative Assessments are the “are we there yet” part of the equation. Formative Assessments are those “in-between” checks for understanding. You probably do more formative assessments than you even realize! 

Here are some examples below. There are SO dang many formative assessments, so this is NOT a comprehensive list!

  • Exit tickets

  • Summary of lesson/standard/concept

  • Venn Diagram

  • Sticky Notes with “yes, I understand” or “no, I’m still confused”

  • Whiteboards (students answer on board and hold up)

  • Thumbs Up/Thumbs Down

  • Your visual observations also count!! 

As I’ve worked with teachers, I’ve seen some teachers implement formative assessments, but then the data is lost. The teacher will do an exit ticket at the end of class, then take a grade on it, and that’s it. The end. No impact on tomorrow’s lesson. Are you cringing? …or are you relating? No judgment, here, I promise! 

Don’t miss the opportunity to let the students guide your lessons! Use formative assessments to help you see where your students are in their understanding, then do something about it! 

Sidenote - Formative Assessments do not always happen at the end of class. It’s best to have plenty along the way and at the end of class! 

Reteaching 

We’re finally at the meat of this blog post! So, let’s talk about when to reteach…

You’ll know when you need to reteach based on those formative assessments we just talked about. We not only need to figure out when we need to reteach, but also when in the schedule to reteach. I know we are always pressed for time - no matter how masterful we are at planning! I’ve got some tips for both of these obstacles. 

When we need to reteach

Let’s make this super simple: reteach when students need it! I know, easier said than done! 

The most effective way to figure out when to reteach (and what to reteach) will be to maximize your formative assessments. Strategically design your formative assessments to show you patterns. Can you create a multiple choice prompt that will show specifically where students are misunderstanding? If the correct answer is A, but the student chose B, what does that tell us?

Here’s an example. 

Which best describes the relationship between investment in capital goods and gross domestic product? 

a. Higher investment in machinery = higher gross domestic product

b. Higher investment in education = higher gross domestic product

c. Lower investment in machinery = higher gross domestic product

d. Lower investment in education = higher gross domestic product

In our example above, “A” is the correct answer. We’ve designed this question in a way that will show us whether students are misunderstanding vocabulary or the concept of the relationship. If students choose “B”, they are mixing up human capital and capital goods. If students choose “C”, they are misunderstanding the concept of the relationship. Students who chose “D” are misunderstanding both (or just guessing). 

See how valuable that is?! This strategy will save you tons of time! I know this will be tough to do for every single question, but if you can do this for even one per day - that’s still helpful! 

Use the results of your formative assessments to determine when you need to reteach. Sometimes, reteaching can be just a couple of minutes. In the example above, clarify the vocabulary mix-up to help students who chose B (take note that those specific students are listening) and check for understanding again. 

Other times, reteaching will need to be a whole class period or a portion of a class period. This will take more planning on your part. If you can’t shift your schedule, you can add in a reteaching group by restructuring one of your days to stations. Have one station with a shortened/modified version of your original plans, and have one station in which you are reteaching. This can look a variety of ways. You can lead either group - depending on the activities you choose. If you can shift your schedule, try to add in a day to reteach multiple concepts at once (to save time). Stations are a great option for this, too. In this case, stations would not rotate. Students would get the reteaching they need specifically. 

For example: 

Station 1: how literacy rates affect standard of living

Station 2: relationship between investing in human capital and GDP

Station 3: relationship between investing in capital goods and GDP

Station 4: Combination of all 3 

Reteaching should happen any time you see that students show misunderstanding. Reteaching can be quick and simple, but it can also be in-depth. You’ll know which you need based on your formative assessments and the nature of the standard/topic. 

When in the schedule to reteach

Our teaching schedules are tight - especially if you’re a Georgia social studies teacher! You have a billion standards to get through. This is exactly why it is SO important to implement frequent formative assessments - as in, a few times during each class period. 

If you are planning to check for understanding frequently during your lessons, you can very quickly identify and correct misconceptions. This might allow you to spend less time later reteaching. You could spend just a couple of minutes on this “reteaching” versus planning a whole section of your instructional time tomorrow for reteaching. 

While you’re checking for understanding, you can also take note of students you may need to pull later for a more in-depth reteaching session. 

In addition, I recommend planning for at least one class period before each unit assessment to reteach. I love using self-assessments to guide this process. I found that giving myself at least 2 days before the assessment was effective. This will give one class period for the self-assessment and one class period for the reteaching based on the self-assessment. This is still going to feel super tight! If you can spare 3 days before the test, that is ideal, and will give you some breathing room! 

Blog post on reteaching strategies - coming soon! 

Blog post on self-assessments - coming soon!


Reflection

After your formative assessments, it’s important to reflect on the results. This is the step I often saw teachers missing. This reflection is how you’ll know when and what to reteach. You need to begin looking for patterns in the results of the formative assessments. Look for patterns of misunderstanding and what they misconception is, plus make note of the students.


Closing

I promised to simplify the concept of reteaching, then I wrote a novel-long blog post - ha! Teaching is an ongoing cycle that includes: teaching, assessing, and reteaching. Wash. Rinse. Repeat. 

To make reteaching easier, it’s important to have clear learning targets, then to implement many different formative assessments, and use those formative assessments to identify patterns. Use these patterns to inform your decisions on what and when to reteach. 

Free Quick Guide

Quick printable reference guide of this blog post’s key points.